Friday, November 2, 2007

Day Eight....Egg Number Six!


When I came home before lunch, I checked the Chicken Palace to see what was happening. Amber was planted in her nest and Honey and Molly were strutting about. I knew that I wanted to get the broody Amber on film in her nesting box, so I took several shots. Still no egg.

Stephen arrived for lunch and immediately headed for the hen house. He opened the door and found a warm egg, which he left until the guys across the street could officially DISCOVER it.


The doorbell rang as soon as Jacob and Joseph got in from school. DING, DING, DING, DING! I knew what was in store. Boy was I surprised as I opened the door to find the lone Jacob on our doorstep. "Can we see if there is an egg?" he asked. Jake and I went out in the backyard and opened to door to the Chicken Palace. He walked into the Chicken Palace and glanced downward. The screaming and yelling commenced, "There's an egg, an egg, an egg," with such commotion that Joseph and his friends came from across the street.

The egg was gathered and the count was taken. This was egg number six...and the seventh will belong to the guys across the street! Stay tuned!

Wednesday, October 31, 2007

Laid today, Eaten tonight...Eggs don't come any fresher than this!

Amber has maintained quite a record! In the past 6 days, she has laid 5 eggs. According to head mathematician, Stephen Atkinson, Amber's production rate is .833 eggs per day! You go, girl!!!!

Egg number 5 was discovered with grand fanfare. Jake and Joseph, the two children who live across the street, pulled in the drive on their bikes as I parked the car. As I opened the car door, they called, "Any more eggs yet?" We walked to the Chicken Palace in great anticipation. As I opened the door, I spied a fresh egg, but didn't let on. I told the boys to go in and look. The both walked in and immediately started jumping up and down yelling, "An egg, an egg, an egg!"

The guys were so excited that I was fearful that the egg might get scrambled before it was gathered, so I told the boys that we needed to go into the house to get the egg basket. In doing so, they called Stephen at work and yelled into the phone that they had found another egg. Their excitement was priceless.

After we took more pictures of the egg, we brought it inside and put it into the refrigerator. Our plans for cooking the eggs had been "hatched" earlier in the afternoon. Melissa would arrive at 6pm and she, Stephen, and I, fully dressed to eat breakfast for dinner, would greet trick-or-treaters and cook Amber's first 5 eggs.
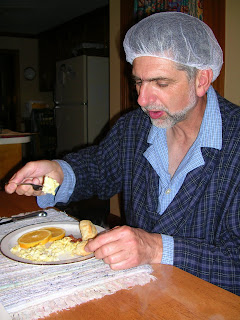
Bacon fried, coffee brewed, mimosas mixed, the Best Drop Biscuits baked (from this month's Cook's Illustrated), and Amber's eggs scrambled ...now we were ready to sit down and enjoy. Divine biscuits, extremely crisp bacon, and everything else outstanding...nothing could top the taste of fresh eggs from Amber's nest. All that we can say is, "Well done, girl. Keep up the great work. While you are at it, clue Molly and Honey into your secrets!"


Sunday, October 28, 2007

I BEEN IN TIME OUT, BUT I'M BACK...AMBER FINALLY DID IT!

Yes, I lost the faith. I've been in time out, and now I'm back (in the words of the famous Hannah Kate Davis). The three Buff Orpington sisters, Amber, Honey, and Molly, have been so busy enjoying themselves in the lavish Atkinson Chicken Palace that they have not seen fit to lay ONE EGG since we picked them up! I have been so disgusted with them that I have not posted an entry on this blog in a month and a half. Well, I certainly should have been sent to time out for having so little faith in these fine ladies.

As reported to many of you already, the first egg appeared on Friday, October 26. Stephen went out to feed "the ladies" (as he calls them) and made such a commotion on the way into the house that I didn't know WHAT had happened. When Stephen had opened the door on the hen house to get the feed, the nest box was empty, but a medium-sized brown egg was right in the middle of the floor nestled in the cedar shavings!


Although we couldn't prove that Amber laid the egg, we were relatively sure. Her wattle and comb are dark red and much larger than those sported by Molly and Honey. According to everything that we have read about Buff Orpingtons, no egg laying occurs in this breed until the wattle and comb are well developed and dark red. Never knew that these wattles and combs were so important to chickens (this link tells more about this)! Our recent trip to the North Carolina State Fair confirmed that our buff ladies were certainly not full grown hens as we had feared. The pullets on display at the fair looked just like our chickens! We knew after our fair visit that we simply needed to be more patient. Only two weeks later, we "hit pay dirt." This last picture shows Amber looking rather proud of her accomplishment!

Saturday, September 8, 2007

Saturday Update...September 8

The Pitt County Farmer's Market was rather quiet today. We bought fresh green beans, tomatoes, and cukes...that was it.

With these purchases behind us, we set out for home with the intent of making homemade pizza dough to rise until later in the day. Our niece, Leslie Anne, has asked for the recipe, so this request provides the perfect opportunity to post our pizza dough recipe below. Tonight, we topped the recipe with homemade tomato herb sauce, sauteed mushrooms, thinly sliced onions, and three cheeses (mozzarella, feta, parmesan) and pine nuts.


Les...the pizza was divine, so here is the recipe for you and Cam. You need to know the variations for your high altitudes in Colorado so that the recipe will be successful for you. Here are the high altitude facts....Looks like you will need to add a bit of additional flour and water to compensate for your 5000+ feet altitude. Here is a website providing all of the details...http://highaltitudebaking.com/adj_recipes.htm.


Whole Wheat Pizza Dough (makes 4 small pizzas…If you only want to make two small pizzas, freeze the other half of the dough AFTER it has risen.)

INGREDIENTS:
1 package dry yeast
1 tablespoon local honey
2 ¼ cups lukewarm water (105 degrees F/42 degrees C)
3 tablespoons canola or corn oil (this type of oil is recommended with whole wheat flour so the "earthiness" of the olive oil and whole wheat flour do not compete)
1 3/4 cups organic whole wheat flour
3 1/2 cups unbleached all purpose flour, plus extra for kneading
1 tablespoon salt

OIL FOR AFTER BAKING:
1/4 cup extra virgin olive oil
Crushed red pepper, to taste
Garlic, if you like

DIRECTIONS:
Stir honey into the lukewarm water. When honey is dissolved, add dry yeast. Let stand until mixture is creamy….7-10 minutes. Stir in oil and whisk in 1 ½ cups of the all purpose flour and the salt, stirring until smooth. Stir in remainder of both kinds of flour until the dough comes together into a rough clump. (I do all of this in my heavyweight counter-top mixer.)

Turn the dough out onto a generously floured work surface. Sprinkle flour over the top and on your hands. Form the dough into a ball ASAP without kneading (adding flour as needed so the dough does not stick to your hands). Place into oiled bowl, cover with plastic wrap, and let rise 3 hours to all day. If the dough rises more than 3 hours, punch dough down and let rise again (and again, if needed) until you begin to make the pizzas.

When “pizza-production” begins, cut the dough into four equal parts. Roll each fourth lightly in flour to make a “ball-like” shape. (Now is the time to freeze any dough that you will not use. Roll each ball to be frozen in plastic wrap and put these balls into zip-lock bag.) Grease pizza pans liberally with olive oil. Shape dough into ovals or rounds. Ensure that edges are thicker than center. PRECOOK dough with no toppings in 500 degree oven for 4 minutes. This will ensure a crisper crust. Remove crusts from oven, add toppings (see suggestions below), and bake in preheated 500 degree oven for 10-12 minutes or until desired crispness has been achieved.

While pizza is cooking, heat ingredients noted above for OIL AFTER BAKING. Set the heated oil aside. After pizza comes out of oven, brush oil on pizza crust edges. This makes the crust crisp and incredibly delicious. Drizzle extra oil over pizza after serving.

Extra dough can be refrigerated for up to two days or frozen in an airtight container for up to one month.

FAVORITE TOPPINGS:
-JA’s fav… pesto sauce, pine nuts, and four cheeses (mozzarella, feta, parmesan, dollops of ricotta)

-Another JA fav…red sauce, pepperoni, mozzarella, feta, parmesan

-Tonight we used… Homemade red sauce with herbs (which we had in the freezer in 2 pizza portions) sautéed mushrooms, thinly sliced onions, thinly sliced red peppers, mozzarella, feta, parmesan, pine nuts, crushed red peppers)

-Another Terry and Stephen fav….pesto sauce, fresh spinach sautéed with garlic and olive oil, thinly sliced sun-dried tomatoes, pine nuts, Kalamata olives, four cheeses

Bottom line…combine any toppings that you like….the leftovers are divine!


FYI...In her book Animal, Vegetable, Miracle, Kingsolver mentions that their regular Friday night fare is homemade pizza. Evidently, all "invited parties" bring their favorite local ingredients and multiple pizzas emerge from the oven after all ingredients are combined. What a GREAT idea!

Wednesday, September 5, 2007

Eating Locally or Eating Regionally?????


-picture taken at Williamsburg Farmer's Market during one of Rachael and Melissa's recent visits

The Eat-Local Backlash

I agree with Josh and Ellen from Charlotte who posted this link on their blog about eating locally in Charlotte. The article The Eat-Local Backlash is worth reading from beginning to end.

"What often arises in the food-miles debate, I think, is a false dichotomy: local vs. long distance. But the most attractive model might be a regional one. McWilliams touches on it, albeit vaguely, with a mention of a "hub-and-spoke system of food production and distribution." Crucially, he clings to the notion that Western consumers can continue to commandeer the globe's bounty perpetually, season be damned...."

I'll be anxious to see what you think.

Monday, September 3, 2007

Girls Just Gotta Have Fun....

Amber, Molly, and Honey had a heck of a day. They spent most of their time in their mobile pen in various locations around the backyard. Joseph (the young boy across the street) came over MANY times to bring a bevy of treats....bugs and corn on the cob...not to mention fresh cinnamon muffins that his mom, Lori, made for the humans who live at 303 Williams Street! Joseph and I searched for fresh crickets for the girls, which he eventually captured and dropped into the mobile pen as "fair game."

Later in the day, Stephen suggested that we offer the girls a fresh ear of corn, which they devoured in "short order." Watch below as they enjoy each and every fresh, juicy kernel...

Tomorrow, an account of "the PERFECT gift." Stephen LOVED it...and showed it off to the neighbors this evening...more about the perfect gift in the next post!

Sunday, September 2, 2007

On A Mission...Tomato Road Trip

Melissa and I talked about canning tomatoes so much after reading Animal, Vegetable, Miracle that not following through was simply not an option. After buying quart jars when I bought jars to make fig preserves and buying the canner that Melissa found at Globe Hardware, the plans for canning tomatoes had to move forward. Unfortunately, I could not find homegrown tomatoes in bulk in Pitt County. During the past several weeks, the tomatoes offered at the Pitt County Farmer’s Market have been “few and far between.” Renston Homestead couldn’t help me (as grape tomatoes are their forte), so Stephen and I set off early Saturday morning on a “tomato road trip.”

We had several Triad locations on our itinerary, but the State Farmer’s Market in Raleigh was our most important destination. We arrived shortly after 2PM and the place was bustling. We began to look for tomatoes and were overwhelmed with all of the choices. Ranging in price from $.89 a pound to $1.25 a pound, I knew that that these prices were too steep for the large quantity that I came to buy. Although Barbara Kingsolver says that she never cans tomatoes unless she has at least thirty pounds of tomatoes, Melissa thought that beginning with a smaller quantity was fine. My first “find” netted a large box of canning tomatoes for $6. The box was heavy, although HOW HEAVY I did not know...I failed to ask how many pounds of tomatoes it contained. As we put the box in the car, I continued to search booth after booth and found no one who was willing to swing a deal for a large quantity of tomatoes. Sidetracked by several very interesting vendors, Stephen purchased a brown turkey fig bush (so he could compete with the other successful fig growers in our area…including his mom!) and I bought some amazingly perfect sunflowers and beautiful cockscomb in fuschia, gold, and chartreuse colors. After buying half a loaf of LaFarm Bakery’s signature farm bread (whole wheat sourdough), we finally hit paydirt. We found a vendor offering a large basket of canning tomatoes for $6.00. We left with 17 more pounds of tomatoes and a great market basket, as well. Last, we bought several ears of fresh corn for the chickens and some gorgeous peppers in an array of colors from a farmer who lives in Climax, NC.

On the way home we bought several local cheeses (Farmer’s Cheese and Herbed Goat Cheese from the Chapel Hill Creamery) and some local milk (Maple View Farm in Hillsborough) at Whole Foods. After one more stop at the Gem and Mineral Show at the State Fairgrounds, we headed home.

This morning as we prepared to begin canning, we weighed in our tomato collection. OK…I went a little overboard! Forty-five pounds of beautiful dead ripe tomatoes waiting to be canned. I might add that at $12 for the lot, these homegrown beauties cost us $.26 per pound. (You might be saying, “But what about the trip and the gas????” We consider this a bargain and a contribution to the local economy considering that the food on the average American’s table when purchased from a supermarket has traveled between 1,500 and 2,500 miles!) After consulting Kingsolver’s directions in Animal, Vegetable, Miracle and the information at
http://www.canning-food-recipes.com/canning_tomatoes.htm,
we plunged tomato after tomato into boiling water, slipped the skins off, and prepared them for hot packing into quart jars.

Six quarts of beautifully canned tomatoes behind us, the remainder of the tomatoes simmered into one of the most divine tomato sauces that I have ever tasted. Adapted from the “Family Secret Tomato Sauce” in Kingsolver’s book (p. 214), the sauce is not only beautiful, but topped whole wheat pasta, sautéed shrimp, red peppers, and garlic this evening to end our day on an exceptionally delicious note. Here is the recipe that I used for this outstanding tomato sauce:

Herb Tomato Sauce

10 quarts tomato puree (about 30 pounds)
4 large onions, chopped
½ cup chopped fresh basil
¼ cup chopped fresh chives
2 tablespoons fresh thyme
1 small bunch chopped Italian Flat Leaf Parsley
4 generous sprigs rosemary
¼ cup chopped fresh oregano
½ cup local honey
3 tablespoons salt
½ Moroccan preserved lemon, rinsed and slivered (fresh lemon rind if you do not have Moroccan preserved lemons...I made some this past winter with the lemons that we grew on our lemon trees.)
2 teaspoons freshly ground pepper
2 teaspoons cinnamon
½ teaspoon nutmeg

Soften onions in a heavy 3 gallon kettle-add a small amount of water if necessary, but no oil if you are canning (very important!). Add pureed tomatoes and all seasonings, bring to a boil, simmer on low heat for 3-4 hours or until sauce is of desired thickness. Stir frequently to avoid burning. Meanwhile, heat water in canner bath, sterilize jars in boiling water or dishwasher, and pour boiling water over jar lids. Add 2 tablespoons of lemon juice to each quart jar before filling with tomato sauce to assure safe acidity. Ladle into jars and leave ½ inch headspace. Cap jars, lower into canner and boil for 45 minutes. Remove, cool, check all seals. Can also be frozen.


Thursday, August 30, 2007

Holy Cow....Blogger Can Now Upload Videos!

I've spent the past week and a half trying to determine how to upload a video of the chickens to the blog. I stayed up tonight determined to add the html code to the blog to link Site Meter or Google Analytics to the blog AND while doing so, I read a news update on Blogger stating that it now uploads video...SO HERE GOES!

Here are Amber, Honey, and Molly being coerced to move into their mobile pen which Stephen and I move to fresh grass each day. The girls are getting better and better at moving back and forth.

Incidentally, for those of you who are "staying tuned," the nesting box is in the Chicken Palace and the girls are quite curious. We wait and look each day but

STILL NO EGGS!

(If you have trouble viewing the video, click on the triangle and watch the grey bar at the bottom of the screen fill completely. When the bar is completely full, click in the area where the triangle was located again and the video will play.)


Ah yes....SWEET SUCCESS!

The jars procured and canning pot purchased (thanks to my friend, Melissa's help), last night I set out to make my FIRST fig preserves. Having followed the recipe the night before, the figs had been quartered and chopped in the food processor. I stirred in only half the sugar that the recipe recommended and Stephen and I taste-tested. The ripe figs were so very sweet that we decided to add no more. The mixture "steeped" in the refrigerator the night before the preserve-making began.

As soon as I came in from work, I poured the fig mixture into a large cooking pot and it simmered on low temperature all evening. Finally as it thickened into what I thought was an appropriate consistency, I sterilized my half-pint jars, tops, and rings. Stephen schooled me in Sterilizing 101 as he had plenty of prior experience as a "canning assistant" to his mom during his youth.

I cut thin lemon slices into quarters and placed them into the jars. Just before pouring the beautiful amber preserves into the jars, I decided to be adventurous (sorry, those of you who know me well understand that I simply cannot follow a recipe verbatim) and stir in some raisins. I know that raisins and lemons are not local, but I simply could not help myself! Nine half-pint jars were filled to the brim along with one honey jar and a favorite tiny jam jar that I had saved. The tiny jar will make a trek to Blacksburg this weekend so that Rach and family can sample the preserves to see how the results of the "blog chronicle" really taste.
Breakfast proved to be a good testing ground and we thought that the preserves were divine on toasted whole grain bread with rosemary and walnuts. Our next experiment will be a wonderful savory bruschetta that our friend, Carol, made for us last fall. After grilling whole grain baguette slices brushed with olive oil, top slices with generous dollops of fig preserves. Then top liberally with crumbled blue cheese. Broil until preserves bubble and blue cheese melts. Last, open a crisp bottle of white wine (probably a pinot), cut some fresh fruit...and UMMMM!


Tuesday, August 28, 2007

Fig Bounty!


There is a standing joke in the Atkinson family about one's fig bounty. Several years ago we planted fig bushes on Mother's Day in two different places...one in our yard and one in Stephen's mother's yard in Clayton, located about 1 1/2 hours east of us. While our bush was a Mission Fig variety and hers was a Brown Turkey Fig, we thought that since they were planted at the same time that we could expect a similar yield. We couldn't have been more wrong!


While our bush flourished and grew so tall that it had to be pruned, Stephen's mom's bush was beaten to death by the yard crew's weed eaters and looked so pitiful during subsequent visits to her house that we were sure that it would die. But alas.....Soon there were reports of small figs growing and her pathetic bush was soon covered with figs ready to pick. Our bush, on the other hand, sported a few figs that either birds or insects devoured or dropped to the ground. Needless to say, Stephen was not happy and his mom bragged about having to hire workers to come in and help pick her crop.

This past weekend when Peggy came to visit, she brought a small bag of ripe figs to us from her bush. During the "yard tour" outside our house, we viewed Stephen's magnificent fig bush....completely devoid of figs. Mission Figs must simply not like the eastern North Carolina climate.
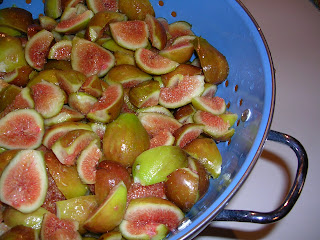
Tonight when Stephen comes in from work, he will be stunned and most likely disgusted at his "lack of yield," compared to other fig growers in the area. My friend, Melissa, caught me before I left work to share the news that her friends, Mary and Panny, had figs and figs and figs. Since Melissa knows how much we love them, she arranged for me to go by Mary and Panny's house on the way home. I was stunned when they gave me a huge bag filled with ripe figs...weighing 5 1/2 pounds on the scale when I returned home. Panny told me that he has picked between four and five BUSHELS of figs from this one bush. As you can see by the pictures, they are beautiful and after sampling a few (yes, I couldn't resist), they couldn't be sweeter. I've read through many recipes and the fig preserves below sound most appealing. The suggestion about adding thin lemon slices really intrigued me. Now the decision before me is to consider whether or not to head out in search of small canning jars!

FRESH FIG PRESERVES
There is probably no better known use for figs (as with most fruit) than as preserves. Debates between cooks continue on whether "real" fig preserves contain some citrus (we like it) and whether one should peel the figs (don't expect me to do it).
Here's the classic guide. Ratio: one cup sugar to one cup chopped fresh figs (it works the same for one pound of sugar to one pound of fresh figs; one palmful of sugar to one handful of figs -- you get the picture...) Grated lemon zest or finely sliced bits of lemon (the paper thin slices make the preserves delightfully like a marmalade - leave them out if this does not please you)
Basic Directions: Cut up the figs as fine as you like. Mix the figs with the sugar and let rest in a covered plastic or glass container overnight. The next morning, cook the mixture down over very low heat until it is soft and thick. Spoon into hot canning jars and cover with lids you've had soaking in boiling (hot) water. The lids will seal as the jam cools. Refrigerate any jars that do not compress and seal.
That's basically it and the recipe has been winning blue ribbons for generations. Everything else is the individual cook's imagination. We like it less sweet and cut back on the sugar. We have had this with a lot of citrus grated and sliced into it; with raisins cooked into it; with cinnamon and other spices. Be careful - the taste of the figs is rich but light and can be quickly overpowered. We recommend trying a straight batch first and then getting adventurous.
Gourmet Variation: A delicious addition to a fig preserve recipe is a drop or two (per jar) of real maple syrup to enhance the natural flavor of the figs. The maple adds just the right touch to the natural flavor of the figs, but only add just a drop or two per jar -- not enough to even be able to identify it as maple. --MZ
Our thanks to Viola Dickerson and Joyce Bradshaw Maria Zee and fig lover V.R. for sharing their winning fig preserve tips with us!


-Recipe adapted from the Fresh Fig Preserve recipe at:


Sunday, August 26, 2007

New Ice Cream Experiences In Colorado

Our ice cream adventures followed us across the United States as we visited our nephew, Jeff, in Fort Collins. Soon after we arrived, he showed us his thriving Chocolate Mint herb plant that resides quite happily on his back patio. I commented that Chocolate Mint herbal ice cream would taste divine. Jeff was really excited because he likes the flavor of chocolate, but has no use for the waxy base that typically accompanies it.

Following the recipe that we had used for our Lavendar Ice Cream and Lemon Verbena Ice Cream (details in earlier posts), we steeped about 2 brimming cups of chocolate mint herb leaves in scalded milk, made the cooked custard noted in the recipe below, and chilled it well. This chilling process is essential if you hope to churn it in 30-45 minutes.

The resulting ice cream was outstanding! The chocolate and mint flavors were subtly evident...all without adding an ounce of real chocolate! After returning from our Colorado trip, we stopped by the Raleigh Farmer's Market to buy some fresh vegetables. Little did we know that we would encounter an herb farm offering both chocolate mint AND Lemon Verbena... we are hoping for more of our own ice cream adventures very soon.
Here is the recipe for the Chocolate Mint experiment!
Chocolate Mint Ice Cream

INGREDIENTS
7 ½ cups whole milk
3 vanilla beans, split OR 2 tablespoons Neilson-Massey Vanilla Extract or Vanilla Bean Paste
2 cups fresh chocolate mint herb leaves, washed thoroughly
1 ½ cups sugar
½ cup local honey (Jeff's honey was from nearby Greeley, CO!)
9 egg yolks
2 cups heavy cream

DIRECTIONS
Scald the milk; then add the vanilla beans (or add vanilla) and the herb leaves. Leave to infuse for 15 minutes. Strain. Beat the sugar, honey, and egg yolks together. Add the milk (a half cup at a time) to egg mixture (stirring egg mixture constantly), until both milk mixture and egg mixture are blended thoroughly. Heat the mixture in a heavy saucepan over moderate heat until it coats the back of wooden spoon and wisps of steam appear. Do not boil. When custard is sufficiently heated, leave to cool. Mixture can sit overnight in the refrigerator. Stir in cream. Put chilled custard into ice cream freezer and churn until firm.

Water and Our Trip to Colorado

Our trip to Colorado was outstanding! The high plains of the state are dramatically different from North Carolina and returning from there gave us a new appreciation for how easily we access water in the east. The climate is so arid there, that it is almost impossible to NOT think about water every time you step outside during the summer months, especially in August. It is imperative that you take water with you wherever you go or dehydration can creep up on you without even realizing it. With water bottles all around us, I thought again and again about the first chapter in Animal, Vegetable, Miracle when Barbara Kingsolver and her family cite lack of access to water as their main reason for leaving Arizona and moving to the mountains of Virginia. I wonder if others share their great concern for living in an area where you don't even have the rights to use water from streams on your own property unless you own the water rights to do so.


I've read much more about this since returning and will admit that I never knew that east of Kansas City, the Riparian Rights to water are dramatically different from the rights west of the same locale. What we take for granted here in the east (in terms of water access on our own property) is against the law in Colorado. Collecting rain water for watering plants or animals is not allowed as water is the property of the state and it cannot be diverted from draining back into the public water system. Such a concept seems inconceivable to me, but it is indeed true. I am grateful for informative websites that have helped further explain these rights and how they evolved in further detail.


I add this entry post to my blog because Kingsolver's book has helped me gain a greater understanding of one of Americas' many wasteful obsessions....drinking bottled water. Although I certainly visit soft drink machines much less than the typical American, I can remember deciding to select bottled water as a "healthier" choice, not realizing how detrimental the bottled water industry is to the environment. Within a country where our tap water is typically safe, clean, and appealing to taste, Americans guzzle more bottled water than any other country in the world. A recent report compiled during four years of investigating the bottled water industry, The Natural Resources Defense Council concluded "there is no assurance that just because water comes out of a bottle, it is any cleaner or safer than water from the tap."


Moreover, the amount of plastic that fills American landfills as a result of our bottled water obsession is mind-boggling. Environmental Products (EPI) is a Colorado-based proponent and leader of oxo-biodegradable plastic additive technology. They strive to promote the use of Totally Degradable Plastic Additives (“TDPA™”) technology as an environmentally friendly and practical solution to the world’s plastic waste problems. Officials from the Earth Policy Institute offer a tangible estimate of how much plastic is generated by bottled water -hungry Americans. "Making bottles to meet Americans' demand for bottled water requires more than 1.5 million barrels of oil annually, enough to fuel some 100,000 U.S. cars for a year." An article from National Geographic News offers additional information about this appallingly wasteful American addiction.


I fill my water bottles with Brita filtered water daily and wish that others would realize how much waste is filling our landfills for no good reason. Perhaps, the only reason that might convince SOME Americans to give up their addiction is to realize how much money they are wasting. Typical bottled water, which in most cases comes from a PWS (public water source), costs as much as $2.50 [U.S.] per liter [$10 U.S. a gallon], more than three times as much as gasoline. Many public officials are banning the use of bottled water by their agencies. I say, "Bravo," to such moves and hope that more public action gains a groundswell.

Monday, August 20, 2007

We made Chicken Flicker's Chicken a day...


Here's the word....our chickens, Honey, Amber and Molly are featured on the web....Check it out! Here is the message that I received via email:


Your beautiful new chickens are featured on Chicken Flicker's One a Day series where we feature a chicken a day.http://chickenflicker.com/1aday/. Click on the August 16 entry!

Monday, August 13, 2007

Moving Day AT LAST!

John Alexander and I worked on finishing the chicken pen all day on Thursday and quit at dark. Stretching chicken wire tautly was not as easy as it looked. Up at 6 AM the next morning, we finished adding the final wire to the side of the cage, built a ramp, spread cedar bedding in the coop, and added a latch to the pen. A roosting stick was added inside the house, but nesting boxes and the front steps would have to wait until later.


We wanted the girls to get acclimated to their new surroundings during the day since we had to leave our house at 1AM to drive the RDU Airport for a 6AM departure to Denver. So as soon as the pen and Chicken Palace interior were ready, we prepared for the big move. The tin roof still had to be screwed in place, but that could take place AFTER Amber, Honey, and Molly moved in.


Temporary pen in transport, the girls clucked happily outside their new home. Stephen suggested that we wait to feed them until they had been moved, which proved to be a brilliant idea. Net in hand, Amber was the first to be scooped up and put in the pen to check out the new digs. Honey and Molly followed with little reluctance until Stephen attempted to soothe Molly before she joined her sisters. OOPS! Too bad about those black pants, Stephen. JA and I hooted, Molly officially joined the girls and the gate was shut. A celebratory repast of chicken feed and fresh corn was enjoyed by all.

Soon after chowing down, the REAL CELEBRATING began. Because the pen area enclosed a shaded area under the pine tree (formerly full of Jerusalem artichokes), a loose dirt floor was the perfect venue for a spa adventure of unending dust baths. Clouds of dust rose from the pen as the girls nuzzled into the cool soil, scratching and throwing dirt with wild abandon.
Most of the day was spent exploring the pen, dust bathing, and exploring again. Their one exposure to the coop’s interior occurred in the late afternoon as a thunderstorm erupted, JA scooped each girl into the side door of the coop where they stayed until the rain subsided. But as soon as the storm ended, they were back in the pen exploring again As we packed inside, we worried about what the hens would do as night fell. Would they willingly scale their ramp and head into the Chicken Palace for the evening? We all took ringside seats on the back deck to watch their antics as the roosting urge struck. As we expected, Amber was the first one inside. One sister followed and we all breathed a sigh of relief. But our lack of anxiety was short lived as the two emerged again. The next fifteen minutes yielded a hilarious shell game of one in, two in, one out, two out, etc. FINALLY, all three girls were in for the night and Stephen crept out to the palace to peek in the window. His eyes left the empty roosting bar and scanned the length of the house to the other end where the large plastic buckets of chicken feed and scratch were stacked. True to form, chickens always seek the highest place they can locate to roost. There they piled, on top of the buckets where they slept.


Before we departed for the airport at 2AM, Stephen stole into the backyard, flashlight in hand, to leave feed and scratch for the girls so they would have fresh food when they “awoke with the chickens” in the morning. Our official “chicken sitters,” our fine neighbors Pam and Tony have kept the girls well fed and watered while we have been gone and as of 7PM this evening, the girls were all doing well. Yes, anxious as we were, we had to phone home to see how Amber, Molly, and Honey were doing. As you must have surmised, there were no eggs sited before we left to take John Alexander back to Colorado State. Now we have fingers and toes crossed that the girls wait until we return home so that we can record the laying of the first egg on film!

Wednesday, August 8, 2007

The Chicken Palace...continues under construction!!!

Complete with a roof, the Chicken Palace is now "taking shape." Home Depot is now on our list of FAVORITE PLACES!!!


You've heard of "gated communities"? Here is JA painting the posts to be used to erect the "gated pen" beside the palace. A ramp will allow Amber, Honey, and Molly to move between the house and pen at their leisure.


The folks at Sherwin Williams also smile when they see the Atkinsons pull into their parking lot. Here Stephen trims the chicken abode with a lovely shade of green called ROSEMARY.


The lattice is added beneath and the pen takes shape. Stephen insists that Amber, Honey, and Molly will move in tonight....WE SHALL SEE!

The girls anxiously wait to make their call to Allied Van Lines!